Automate SharePoint External Access Requests with Power Automate
Build an automated SharePoint external access request process using Microsoft Forms, Power Automate, and Teams to review requests, grant access, and track approvals.
Automating SharePoint External Guest Access Requests with Microsoft Forms, Power Automate, and Teams
If you’ve ever tried to enable someone outside your organization to request access to a SharePoint library, you know it’s not straightforward. Normally, they need a tenant account first, which is a bit of a catch-22.
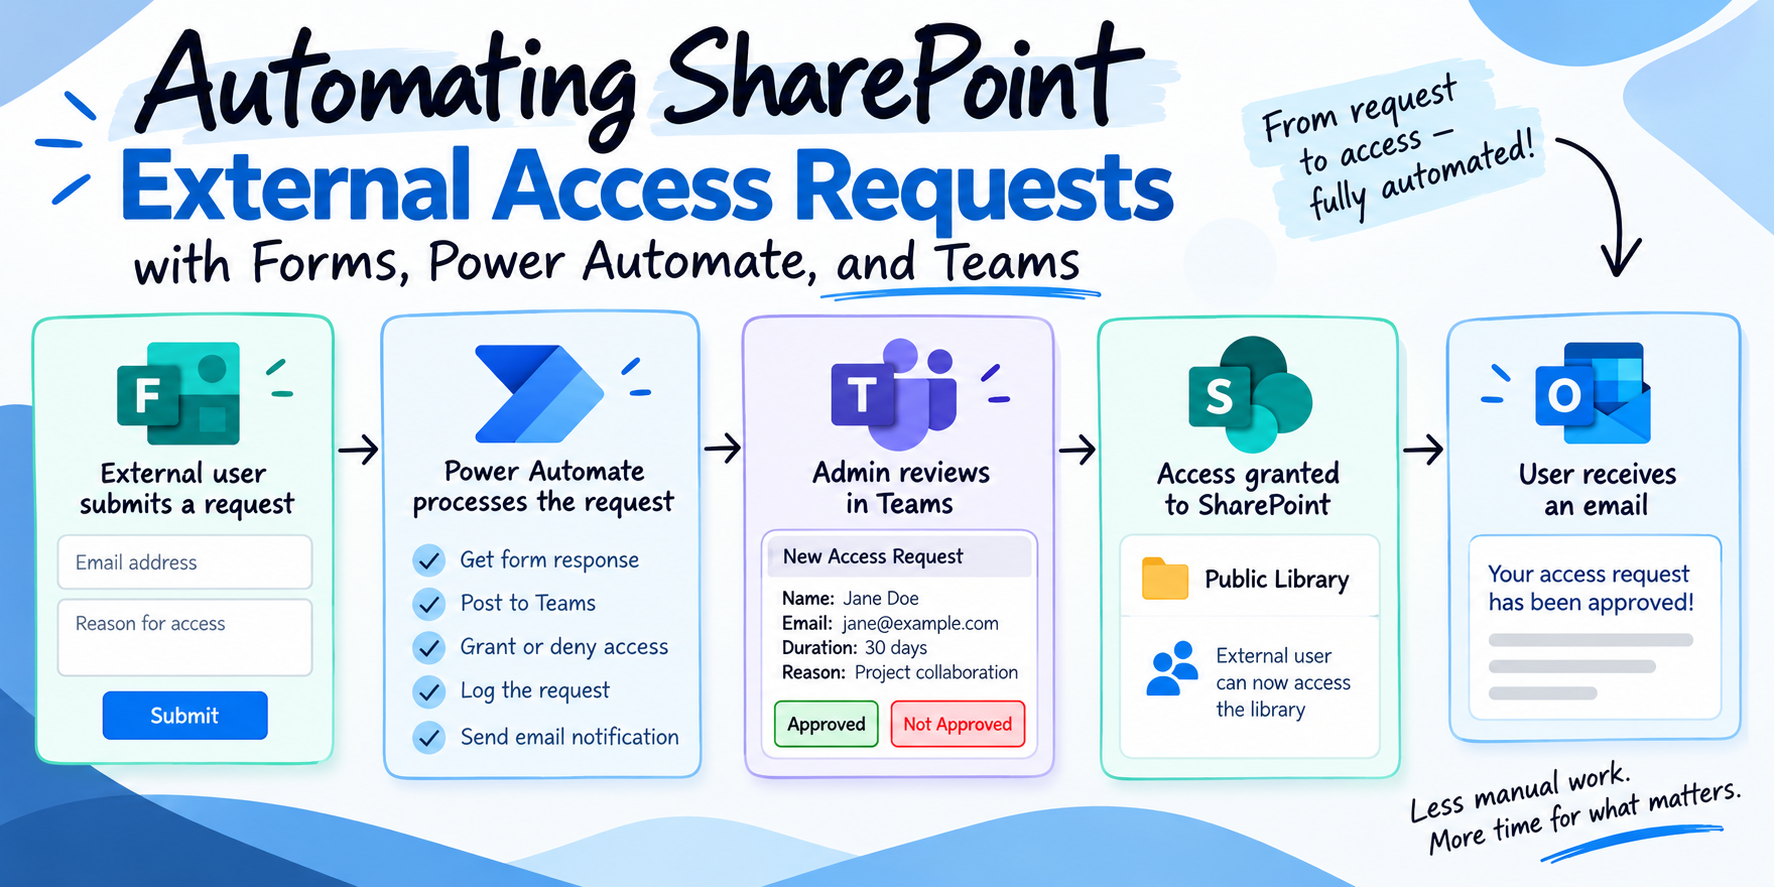
In this tutorial, we’re going to solve that using Microsoft Forms, Power Automate, and Teams. We’ll create a seamless process where your user fills out a simple form. Once submitted, you’ll receive a notification in Microsoft Teams, allowing you to review the request and approve or deny with a click. Power Automate will handle the rest, granting or denying permission and logging the request. Let’s dive in!
Setting Up Permissions
Before starting, ensure that your tenant allows guest invitations. In the Entra admin center, navigate to External Identities → External collaboration settings and check the Guest invite settings. Ideally, permissions are set so anyone can invite guests, provided they have proper SharePoint permissions.
In the SharePoint admin center, under Policies → Sharing, adjust settings to allow sharing with new and existing guests. This ensures that users can share with both existing guests and new ones.
Creating the Access Request List
First, create a list in your SharePoint site to track requests. I named mine Public Library Access Request. Capture these details:
- User Email – Essential for granting permissions.
- Status – Approved, Not Approved, or Access Expired.
- Name – Requester’s name.
- Reason for Access – Purpose of access.
- Access Start Date and Access End Date – Date range for access.
Configuring the SharePoint Library
Create a basic document library named Public Library. You can break permission inheritance or keep it simple, as we will grant direct access. Now, let’s set up the flow.
Building the Power Automate Flow
Initiating the Flow
Start with a Forms trigger: When a new response is submitted. Choose your form. If it’s a group form, it won’t show up in the drop-down. Retrieve the Form ID from the URL as described in Microsoft’s documentation.
Getting the Form Response
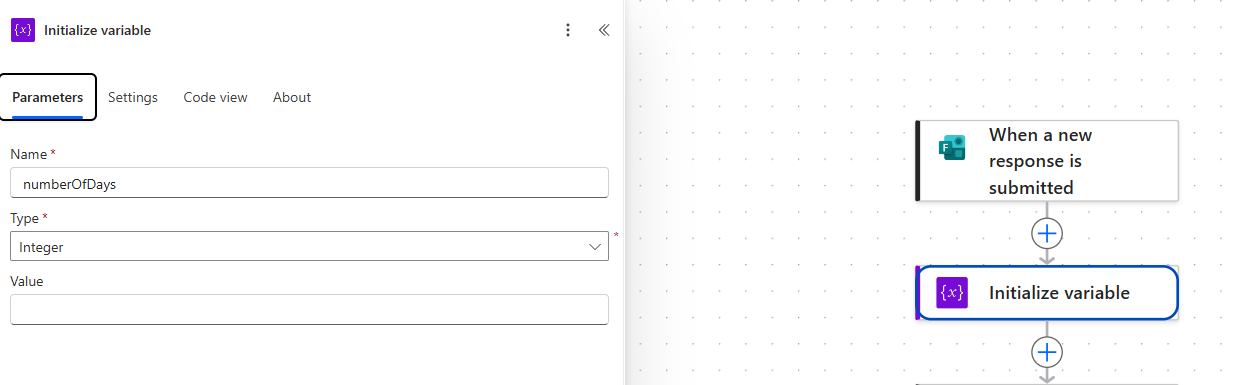
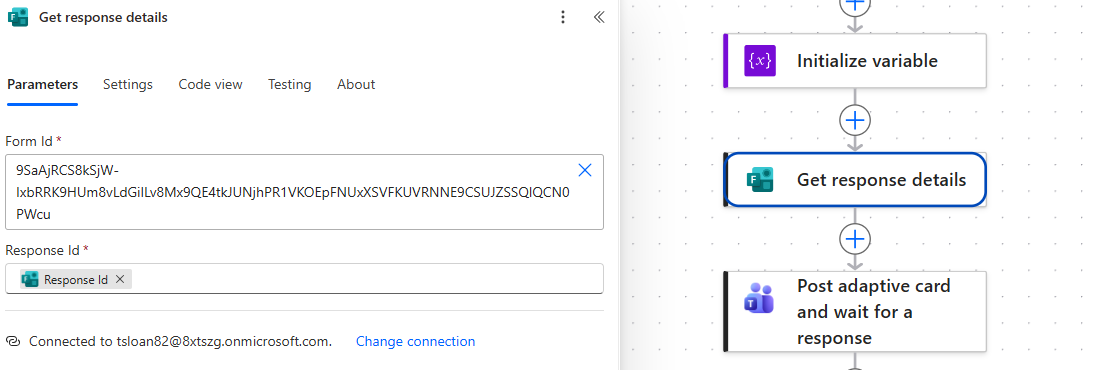
Create an integer variable called number of days. We’ll use this to calculate the access duration. Add the Get response details action using the Form ID and Response ID.
Sending a Request to Teams
Use the Teams action Post an adaptive card and wait for a response. You’ll post this in a Teams channel, and the card will include:
- Requester’s name and email
- Access duration and reason
- Buttons for Approved or Not Approved
Here is the JSON you will post in the Message field
Make sure you update the value in the FactSet block to match what your fields are
1
2
3
4
5
6
7
8
9
10
11
12
13
14
15
16
17
18
19
20
21
22
23
24
25
26
27
28
29
30
31
32
33
34
35
36
37
38
39
40
41
42
43
44
45
46
47
48
49
50
51
52
53
54
55
56
57
58
59
60
61
62
{
  "type": "AdaptiveCard",
  "$schema": "http://adaptivecards.io/schemas/adaptive-card.json",
  "version": "1.4",
  "body": [
    {
      "type": "TextBlock",
      "text": "Public Library Access Request",
      "weight": "Bolder",
      "size": "Medium",
      "wrap": true
    },
    {
      "type": "TextBlock",
      "text": "A new access request needs your approval.",
      "wrap": true,
      "spacing": "None",
      "isSubtle": true
    },
    {
      "type": "FactSet",
      "facts": [
        {
          "title": "Requestor Name:",
          "value": "@{outputs('Get_response_details')?['body/r6eef7722dae14c3985304bd7be854a74']}"
        },
	{
          "title": "Requestor Email:",
          "value": "@{outputs('Get_response_details')?['body/rcb8aae52570647c19ffb9efe580bba9e']}"
        },
        {
          "title": "Access Duration:",
          "value": "@{outputs('Get_response_details')?['body/re3eff3d2664749b5aa71ccf7f5006346']}"
        },
        {
          "title": "Reason:",
          "value": "@{outputs('Get_response_details')?['body/rf3cc84ef981d4cafa1c68e3737bf5bda']}"
        }
      ]
    }
  ],
  "actions": [
    {
      "type": "Action.Submit",
      "title": "Approve",
      "style": "positive",
      "data": {
        "action": "Approved",
        "userEmail": "${userEmail}"
      }
    },
    {
      "type": "Action.Submit",
      "title": "Not Approved",
      "style": "destructive",
      "data": {
        "action": "Not Approved",
        "userEmail": "${userEmail}"
      }
    }
  ]
}
Handling the Access Duration
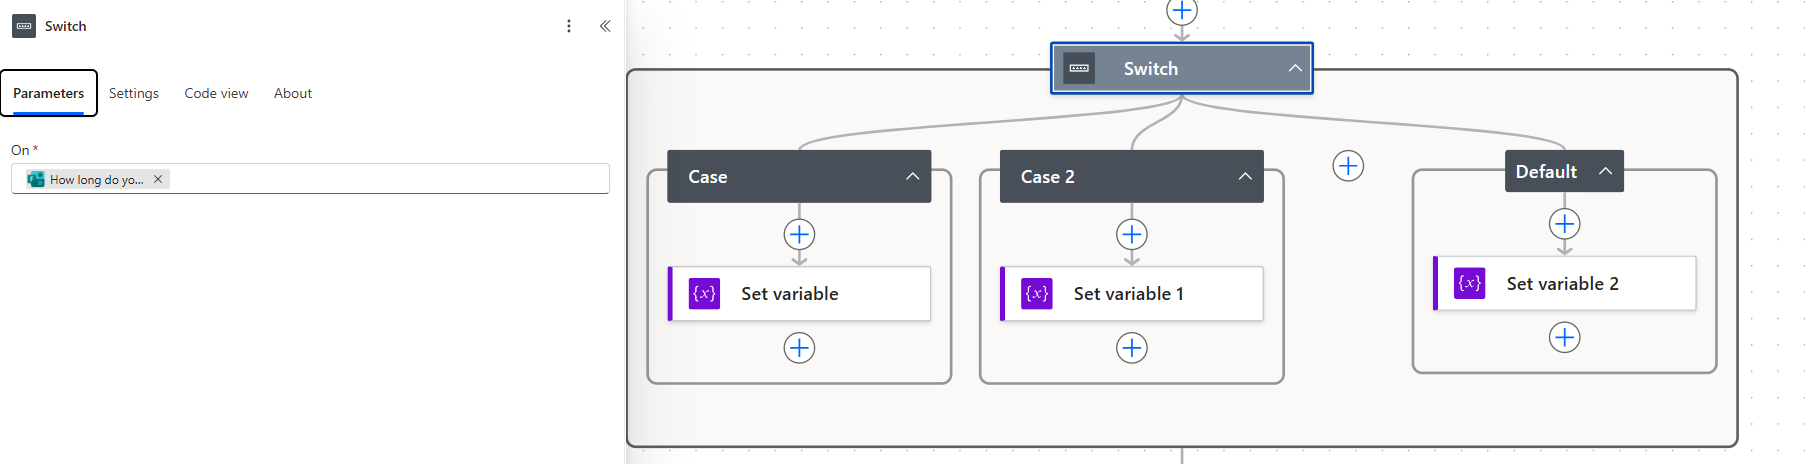
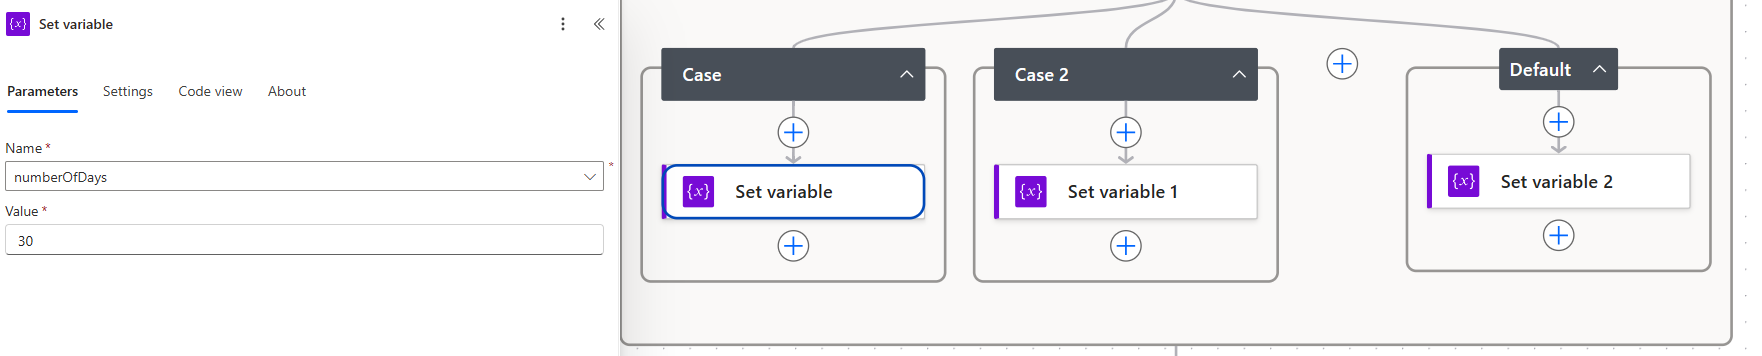
Implement a Switch control to process access duration options: 30, 60, or 90 days. Adjust the number of days variable accordingly, ensuring the case matches exactly as in the form.
Managing Approval Conditions
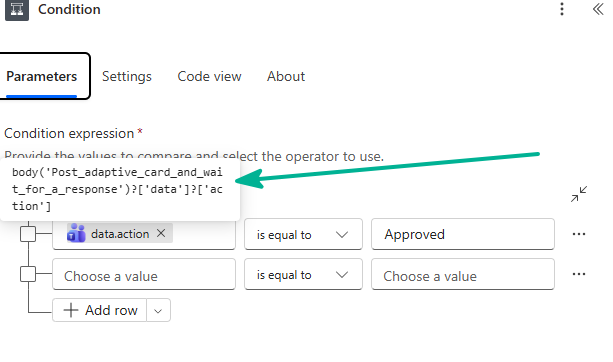
Add a Condition to check which button was pressed. If Approved, take the true path; otherwise, follow the false path.
You will need to use a function here as the data sometimes does not populate when using the Dynamic values
Granting SharePoint Library Access
For approved requests:
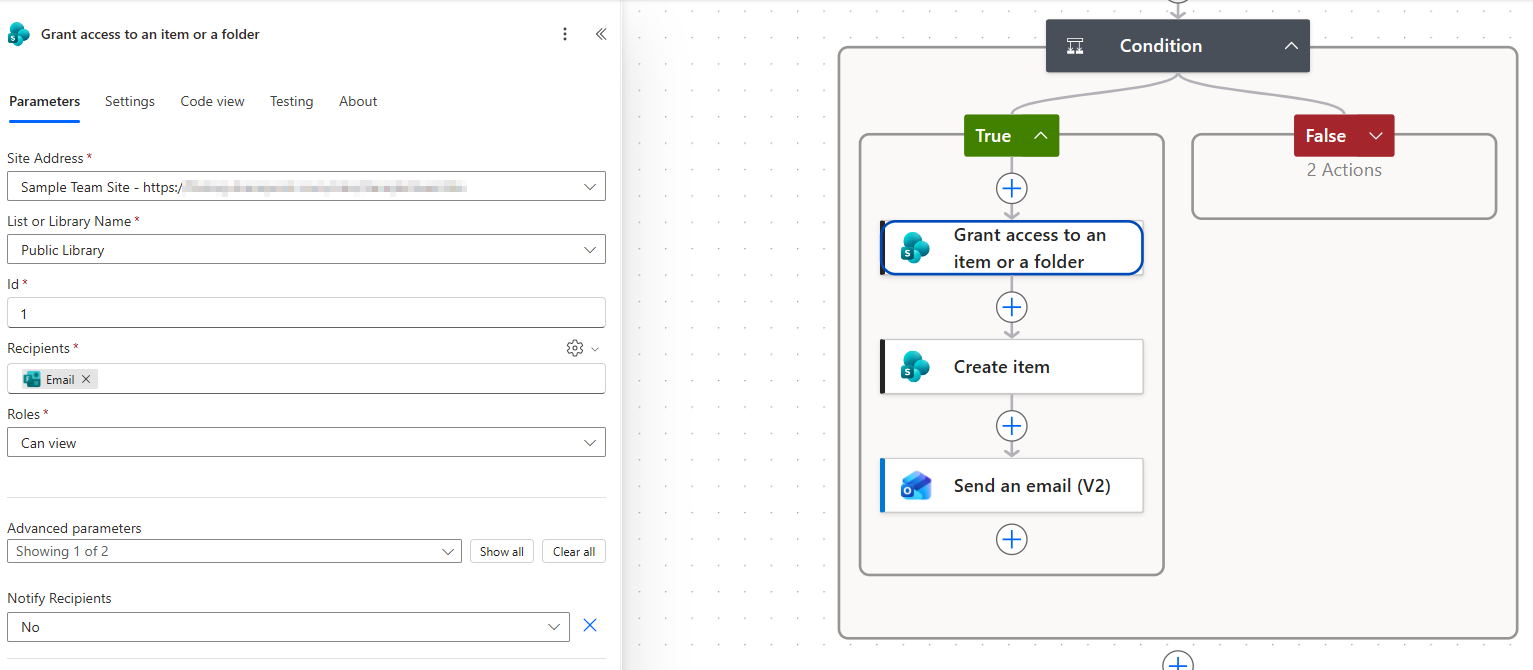
- Use the Grant access to an item or a folder action in SharePoint.
- Provide the library’s root ID (1) for full access.
- Set permissions (e.g., View access) and disable generic notifications.
Logging the Request
Log approved requests in SharePoint using the Create item action.
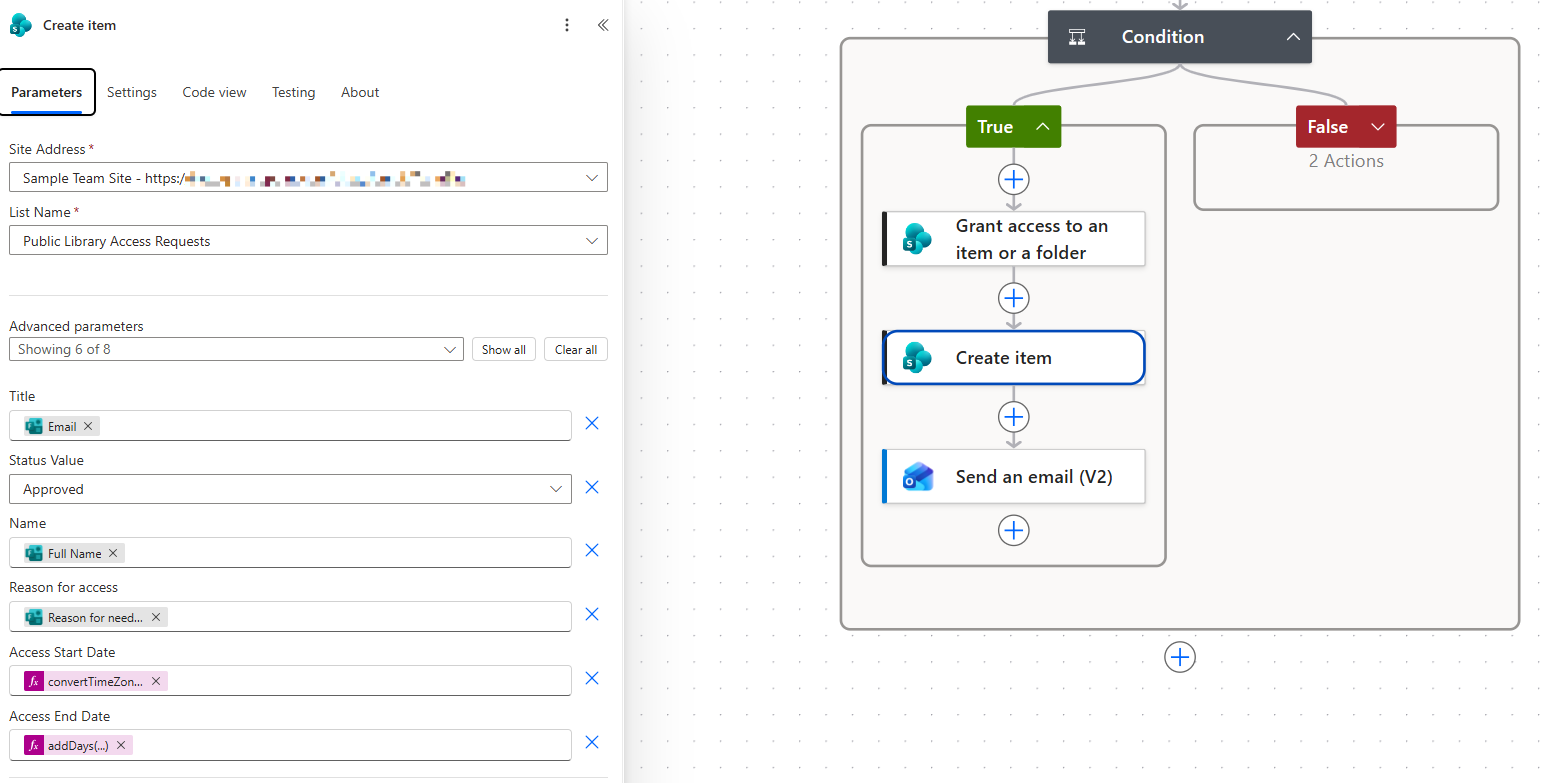
Populate fields from the form and set dates using functions updating the timezone to your timezone.
Access Start Date
1
convertTimeZone(utcNow(),'UTC','Central Standard Time','yyyy-MM-ddT00:00:00Z')
Access End Date
1
addDays(convertTimeZone(utcNow(),'UTC','Central Standard Time','yyyy-MM-ddT00:00:00Z'),variables('numberOfDays'),'yyyy-MM-ddT00:00:00Z')
Sending Approval Notifications
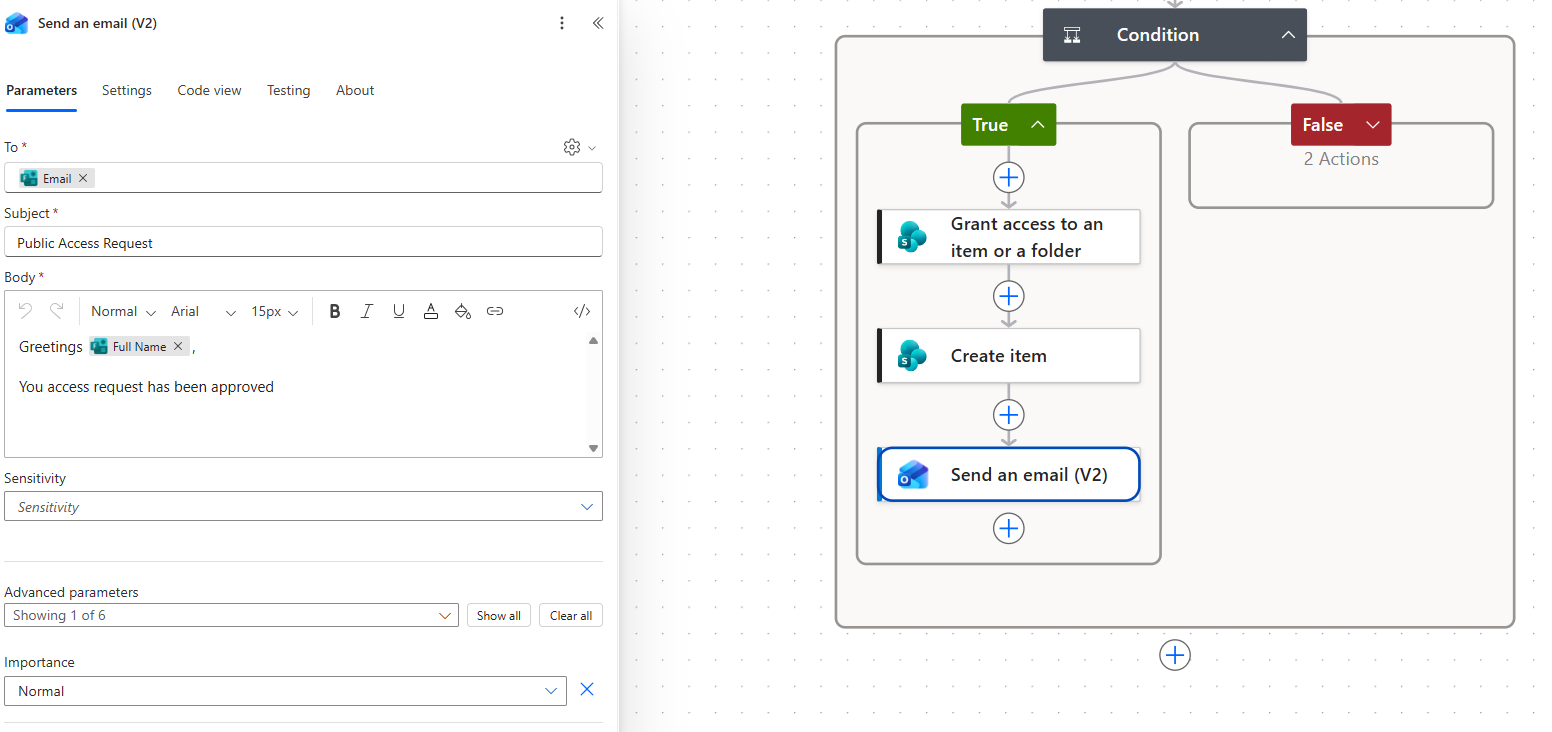
Send a personalized approval email using Outlook’s email action.
Processing Denied Requests
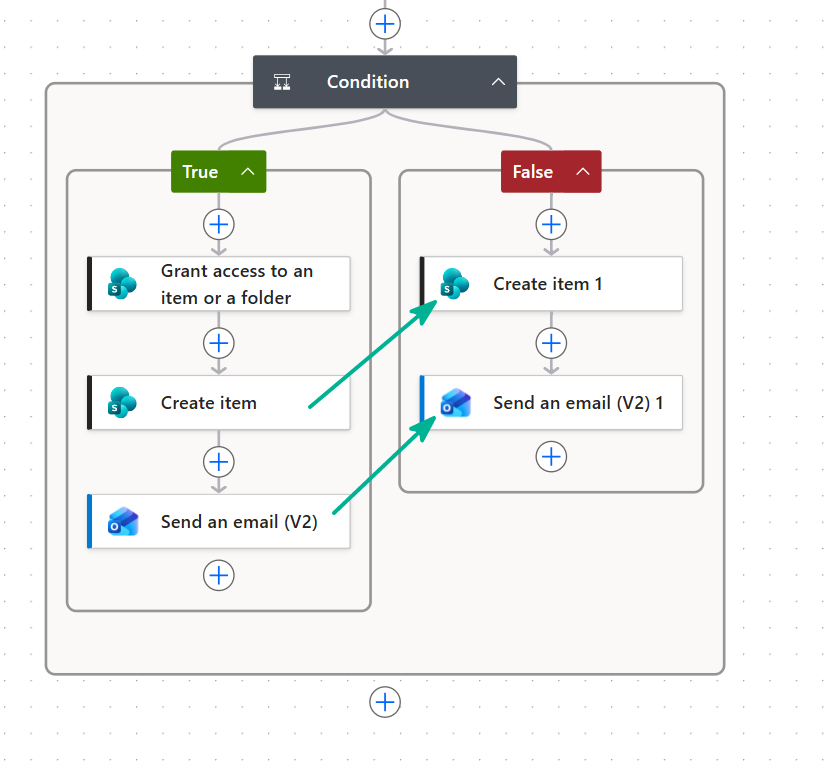
For denied requests, log them with a Not Approved status and send an email notifying the user.
Since the actions for approving and not approving are almost identical, you can just copy the actions and paste them into the False route. Be sure to update the action properties for each action you paste.
Testing the Flow
Using an incognito window simulates an external user. With a temporary email address, submit the form to test both approved and denied paths.
- Approved Test: Verify access granted via SharePoint and email notification.
- Denied Test: Ensure request logged correctly and notification sent.
Confirming External Access
Check if the user can access the library. Sign in with the test email and use Microsoft’s one-time code system to verify access.
Reviewing Permissions
Inspect library settings to confirm permissions are rightly assigned. SharePoint should reflect limited access for the external user.
And there you have it! We’ve automated a way for external users to request and receive access to a SharePoint library, minimizing manual workload for administrators. If you’re dealing with external SharePoint requests, this method provides an efficient and reliable workflow. Happy automating!