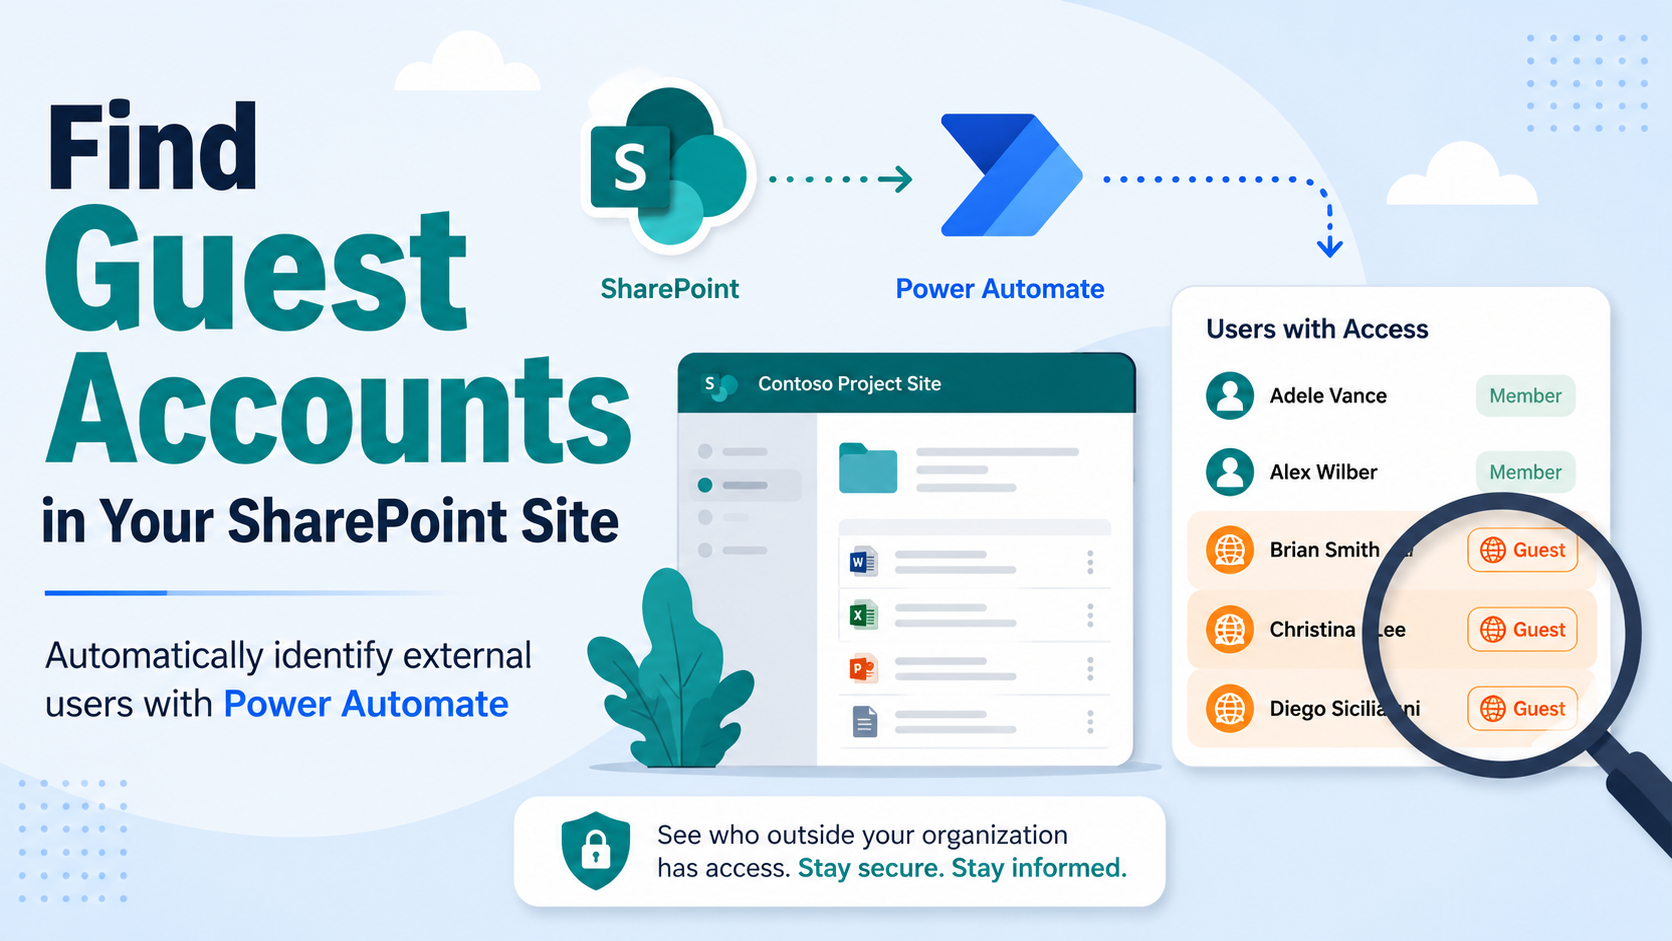
Finding guest accounts in your SharePoint site

Using Power Automate to quickly find guest accounts that have access to your SharePoint site
In SharePoint, when you share a site, document, or list with someone outside your organization, that person becomes a guest. Behind the scenes, SharePoint leans on Azure Active Directory (AAD) to manage that guest account. So, they’re not just floating around in your site—they have a proper guest account in your Azure AD tenant.
This guest account lets them sign in, access only what you’ve shared, and makes it easy to track them for security and auditing. Think of Azure AD as the gatekeeper and SharePoint as one of the rooms guests are allowed to enter. You control the keys using things like conditional access, multi-factor authentication, or expiration policies.
Keeping track of guests can get tricky. You could dig through SharePoint groups manually, but why make life hard? I built a simple, no-code flow that scans your SharePoint groups and flags any guest accounts automatically. It’s quick, easy to set up, and a solid little tool to keep your site secure without breaking a sweat.
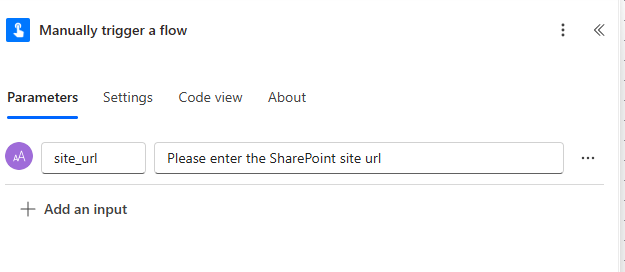
Trigger
The trigger we’ll use is manual. Add an input to capture the URL of the SharePoint site you want to scan for guests.
Actions
The first action we’ll use is the Initialize variable action. This built-in action allows us to create a variable that we can later update in our flow.
Click on the plus sign under your trigger. On the left-hand side search for the Initialize variable action and add it to your flow. You will need to give it a name and pick the type of variable. For this flow we’ll call it “guestList” and it will be an array variable.

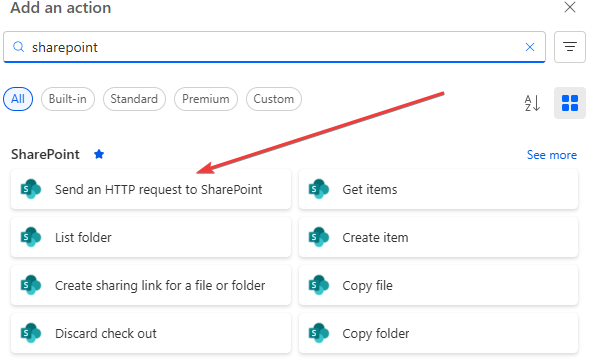
The next action to add is the Send an HTTP request to SharePoint action that uses the SharePoint connector.
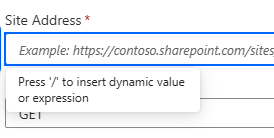
For the Parameters of this action we are going to add the URL of the SharePoint site that you collected in the trigger. Start by clicking on the Site Address property. You should see a drop-down list of SharePoint sites. Scroll all the way to the bottom and select Custom value. Now click in the Site Address box again and a message should appear. Press “/” and select dynamic value.
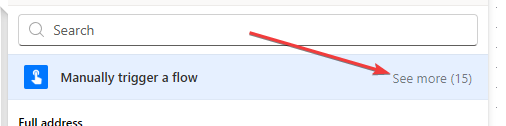
A list of previous actions and the trigger will show. Select the trigger (“Manually trigger a flow”) and click on See more next to it.
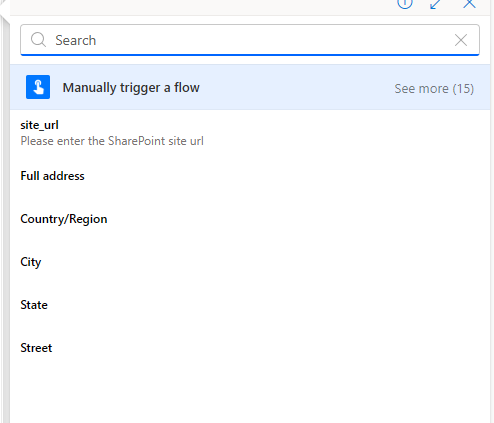
Select the “site_url”, or whatever you named your trigger input.
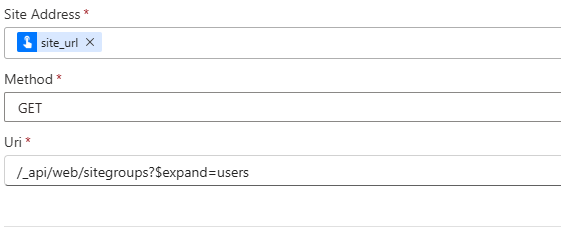
For the Uri enter the following exactly as shown including the forward slash as the start.
1
/api/web/sitegroups?$expand=users
You can leave everything else as-is and you should be left with an action that looks like this.
If you want, you can test the flow now. Click on Test in the top right of the screen, choose “Manually”, then Save & Test at the bottom. You may be prompted to connect your account — do so.
You will see a box appear asking you to input the site address. It should look similar to this:
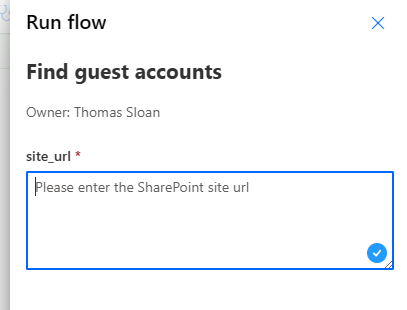
Enter the address of the site collection. Click OK and the flow should run. If everything is successful, move on to the next step. Otherwise, review the steps above and make sure your trigger and action settings match.
Looping through the groups
If you click on the Send an HTTP request to SharePoint action and open Output, you can see the JSON returned by SharePoint. Buried in that response are:
- All the SharePoint groups for that site
- Each user within each of those groups
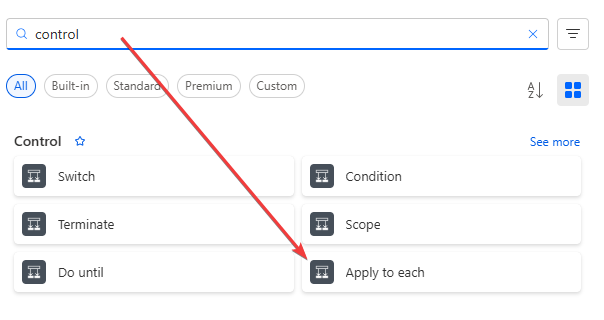
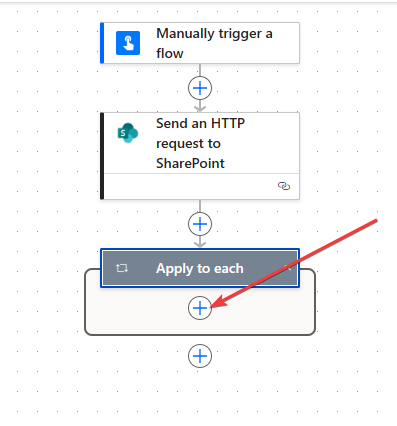
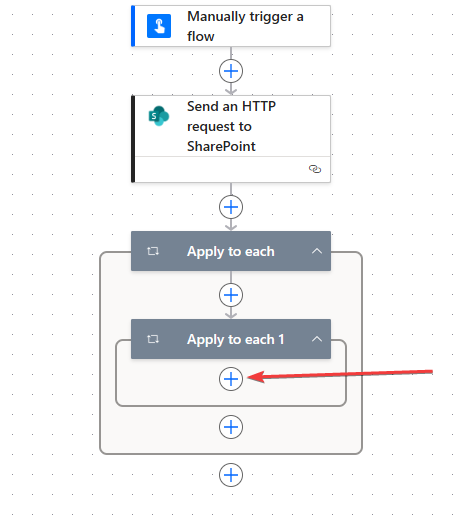
Now, we need to loop through each group and then through each user looking for external/guest users. Add a new action and search for Control. Add the Apply to each action.
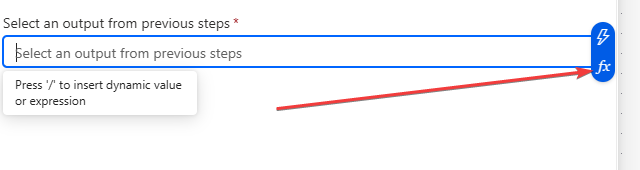
Click on the action to open its properties. Click in the input where it says “Select an output from the previous steps” and then click on the function icon.
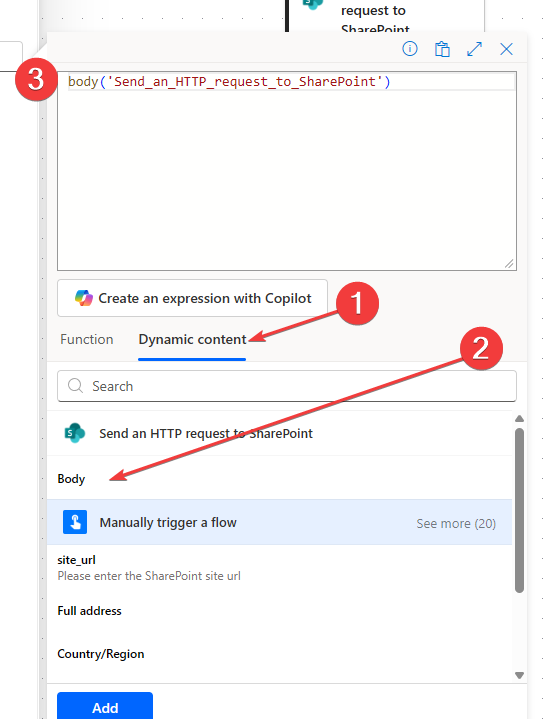
In the pop-up, click on Dynamic content and then select Body from the Send an HTTP request to SharePoint. This will add the response content from the Send an HTTP request to SharePoint node.
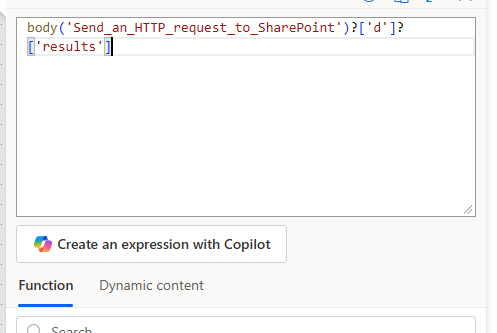
Since we only want to loop through each group, we need to adjust the code to only look at the results array. Add the following:
1
?['d']?['results']
Once added, it should look like the image below.
Click on Update.
Looping through the users
Inside the Apply to each action we’ll add another Apply to each action.
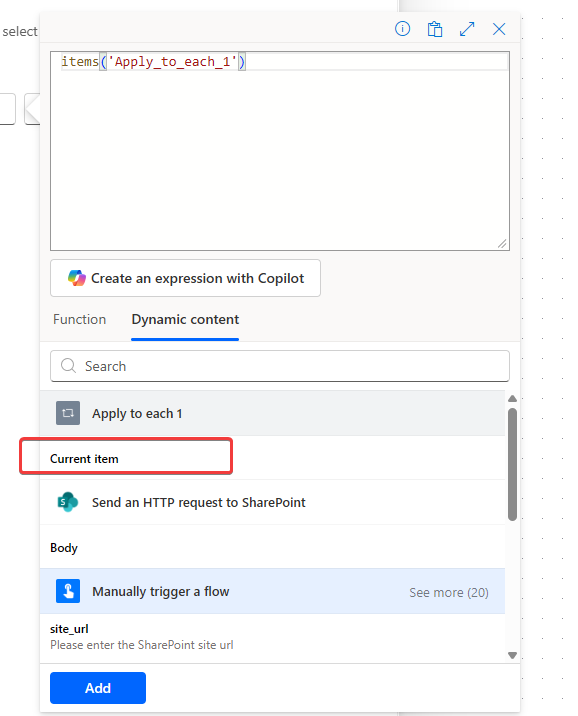
Follow the steps as before, adding a function to the action. This time, instead of picking the output of a previous action, scroll to the bottom and select Current item. This means we are looking at the current item (in our case the SharePoint group).
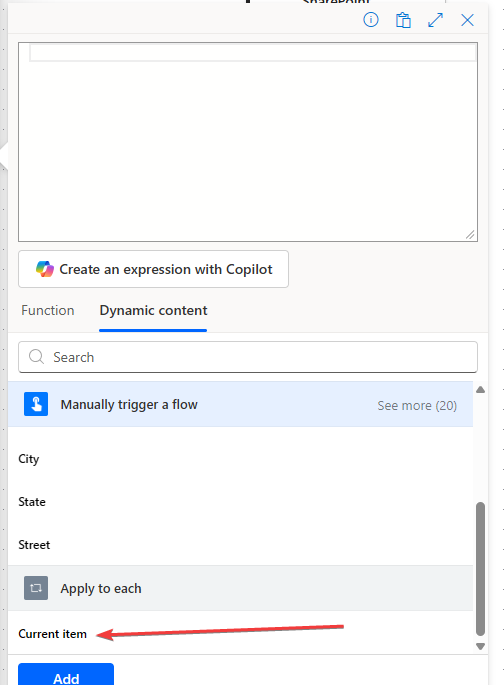
Now we need to update the code again to focus on just the users in the current SharePoint group we are looking at.
1
items('Apply_to_each')?['Users']?['results']
This code tells it to look at each result in the “results” array under “Users”. This is because each user will be a separate item in the results array.
Finding guest accounts
Now we can finally start looking for guest accounts. First, let’s take a look at what user properties are available to us. Below is an example of a fake guest user I temporarily added to one of my SharePoint sites.
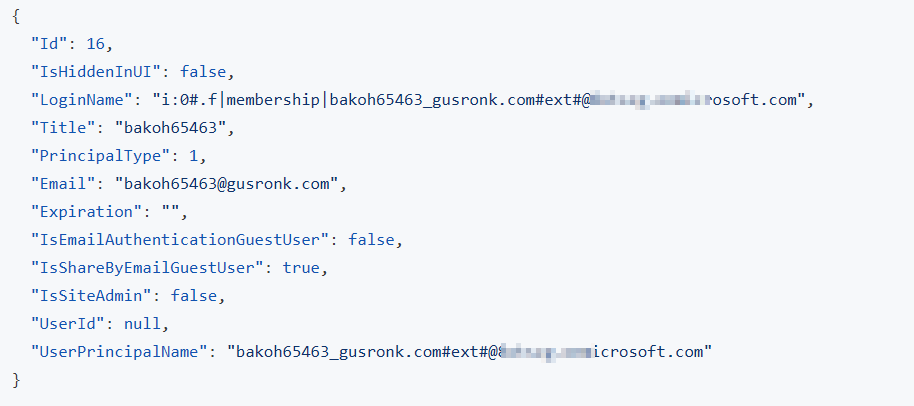
There are a few properties here that identify this user as a guest:
- IsEmailAuthenticationGuestUser
- IsShareByEmailGuestUser
- LoginName
- UserPrincipalName
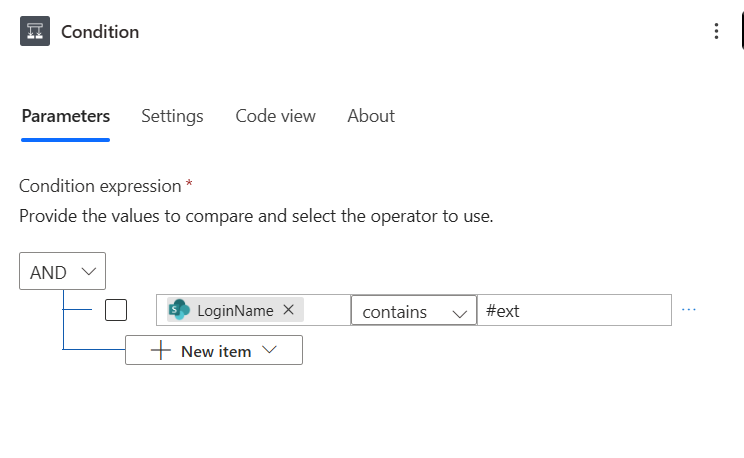
We are going to focus on the LoginName for this example. Specifically, we’ll look for the #ext# substring. This is the tag Azure AD adds to indicate an external account.
Back in our flow, let’s add another action: the Condition action. This is a Control action, so search for Control and add it.
You need to add this action to the last Apply to each action that you added earlier.
Click on “Condition” and then the “Choose a value” box in the Condition’s properties. Like before, add a function and then add Dynamic content. Select the Current item from the Apply to each 1. The current item is the current user we are looking at in our loop.
Update the code so it looks like this
1
items('Apply_to_each_1')?['LoginName']
Then click on Add.
We need to check if the LoginName contains the string “#ext”. Select contains in the dropdown list. Finally enter the string #ext. It should look like this
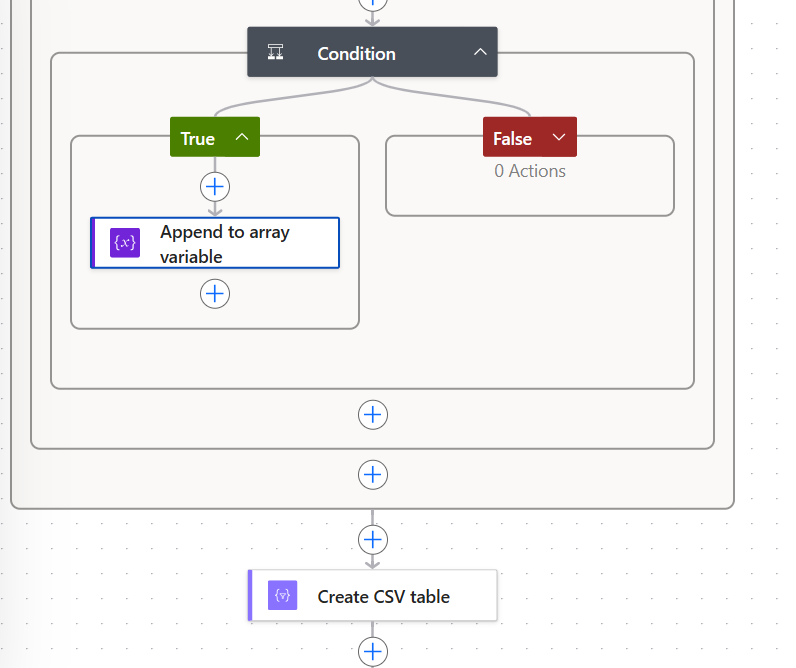
Updating our variable
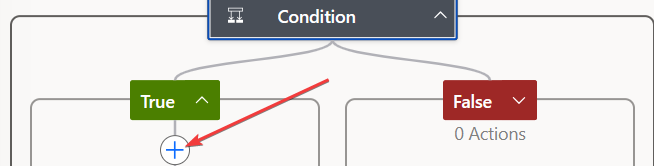
Recall the array variable we created at the very beginning of the flow. We will update it in the True branch of our Condition action.
Click the plus button in the True branch and add a new action called Append to array variable.
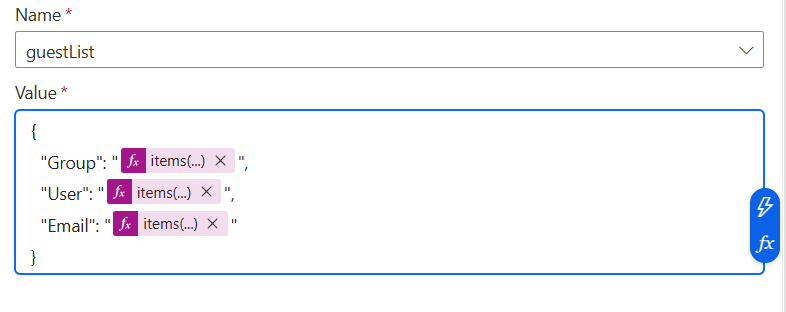
In the properties select the array variable we created at the start of our flow. Enter the following in the Value field:
1
2
3
4
5
{
  "Group": "@{items('Apply_to_each')?['Title']}",
  "User": "@{items('Apply_to_each_1')?['Title']}",
  "Email": "@{items('Apply_to_each_1')?['Email']}"
}
Let’s go over what this is doing. We are creating a JSON object that we append to the array variable. A JSON object will be created for each guest account the flow finds.
The Group key’s value is the Title of the SharePoint group that we are currently looking at. The User key’s value is the Title (display name) of the current user. Finally, the Email key’s value is the email of the current user.
The { } mark the start and end of a JSON object.
If you copied and pasted the above code into the value field, you should see something like this:
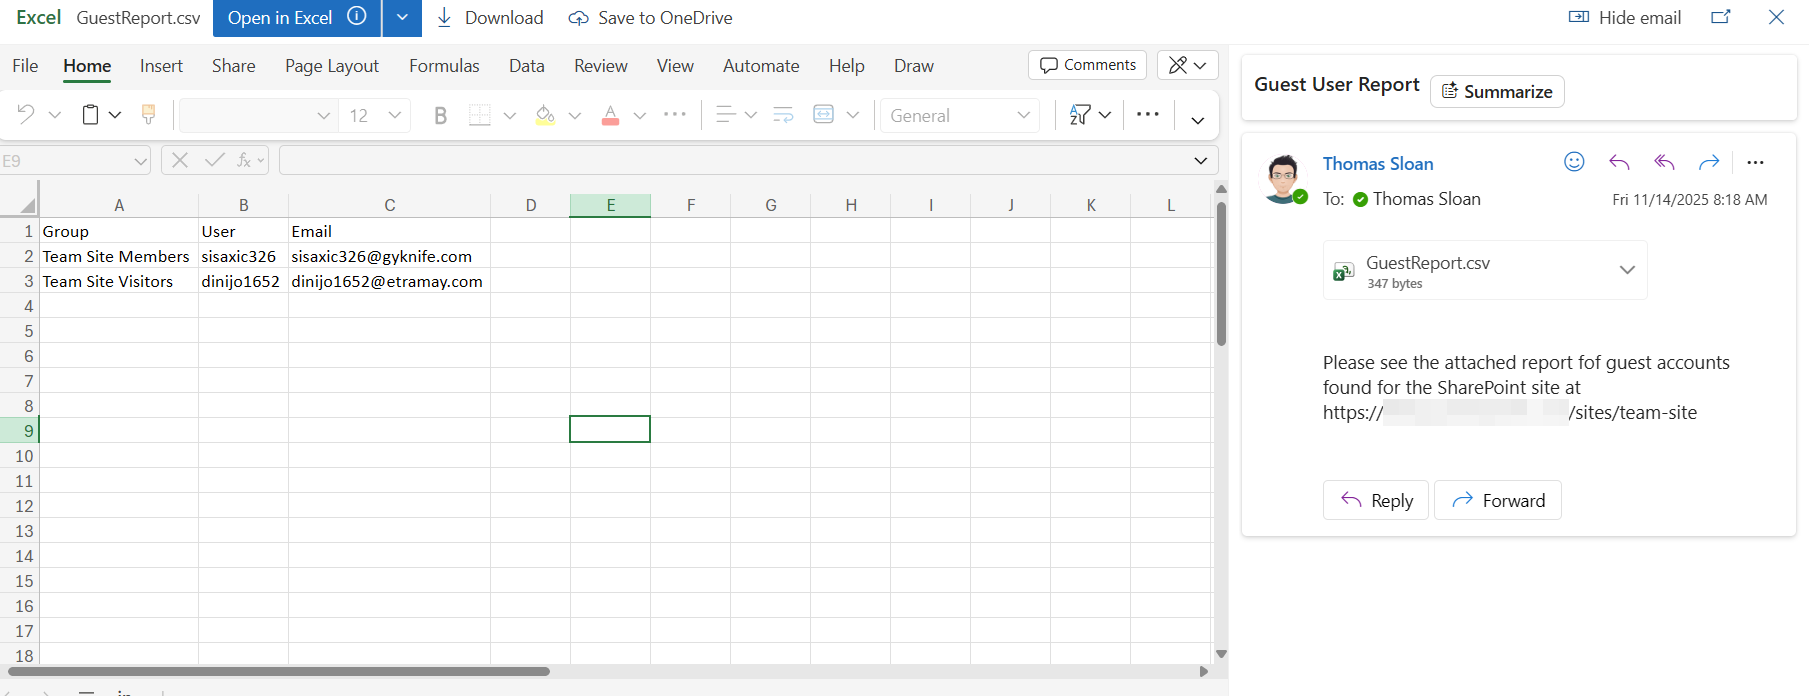
Emailing the report
If we run the flow we will end up with a JSON array of objects — one for each guest account. Now we need to format that into something more usable for an end user, such as a CSV file, and attach that CSV to an email.
Add an action called Create a CSV table to the very end of your flow. Make sure you don’t add it inside any loops.
For the action parameters, in the From box add a dynamic value and select the guestList array. That’s all the action needs to create a CSV table. You can change the “Column” header names under Advanced settings, but for now leave them as the defaults. It will automatically use the keys in the array (“Group”, “User”, “Email”) as the column header names. You can always change the key names if you prefer different headers.
The last step in our flow is to email this report to a user.
In this example we hardcode the recipient. You can instead add another trigger input for the recipient email and use that value. Provide an email in that input or reference it in the action.
Add the Send an email (V2) action as the very last action in the flow. There are multiple connectors that allow you to send an email; the one shown here is the Office 365 Outlook connector.
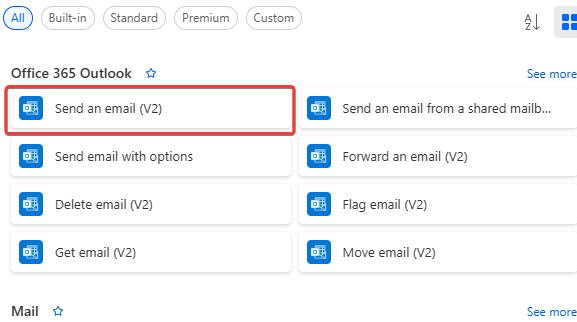
Note that connectors are updated over time and you may find multiple versioned actions. At the time of writing, “V2” of the Send an email action was the latest version.
The parameters for this action are pretty self-explanatory. There are a few to focus on:
Body: For the body I like to include the site the report was run against. Use the trigger input name to insert the site URL (for example @{triggerBody()?[‘site_url’]}).
1
Please see the attached report fof guest accounts found for the SharePoint site at @{triggerBody()?['text']}
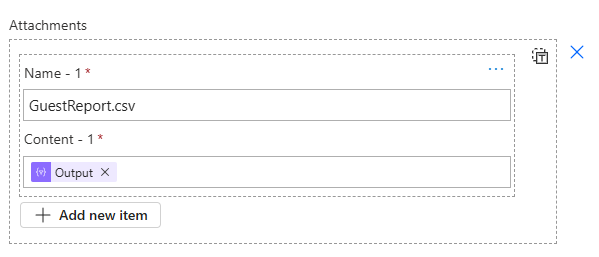
Attachments: Under Advanced parameters select Attachments.
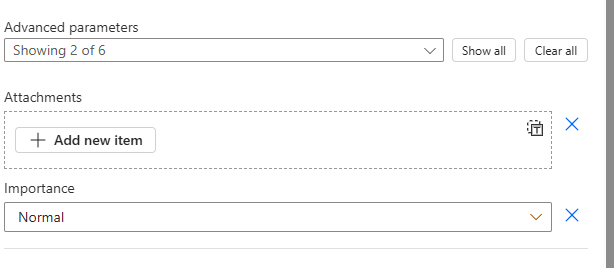
Click on Add new item. In the Name field provide a name for the attachment. Make sure it ends with .csv; for example, GuestReport.csv.
For the Content add a dynamic value and select the output of the Create CSV table action.
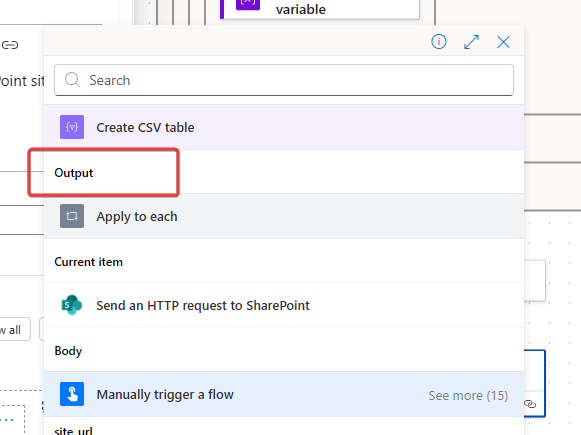
It should look like this
Testing the flow
Save and test the flow. Provide the trigger with the URL of a SharePoint site that you have access to (preferably Site Collection Admin or Owner access) and one that has known guest accounts in its SharePoint groups. The flow should run and send you an email with a CSV attachment that contains all the guest accounts on the site.
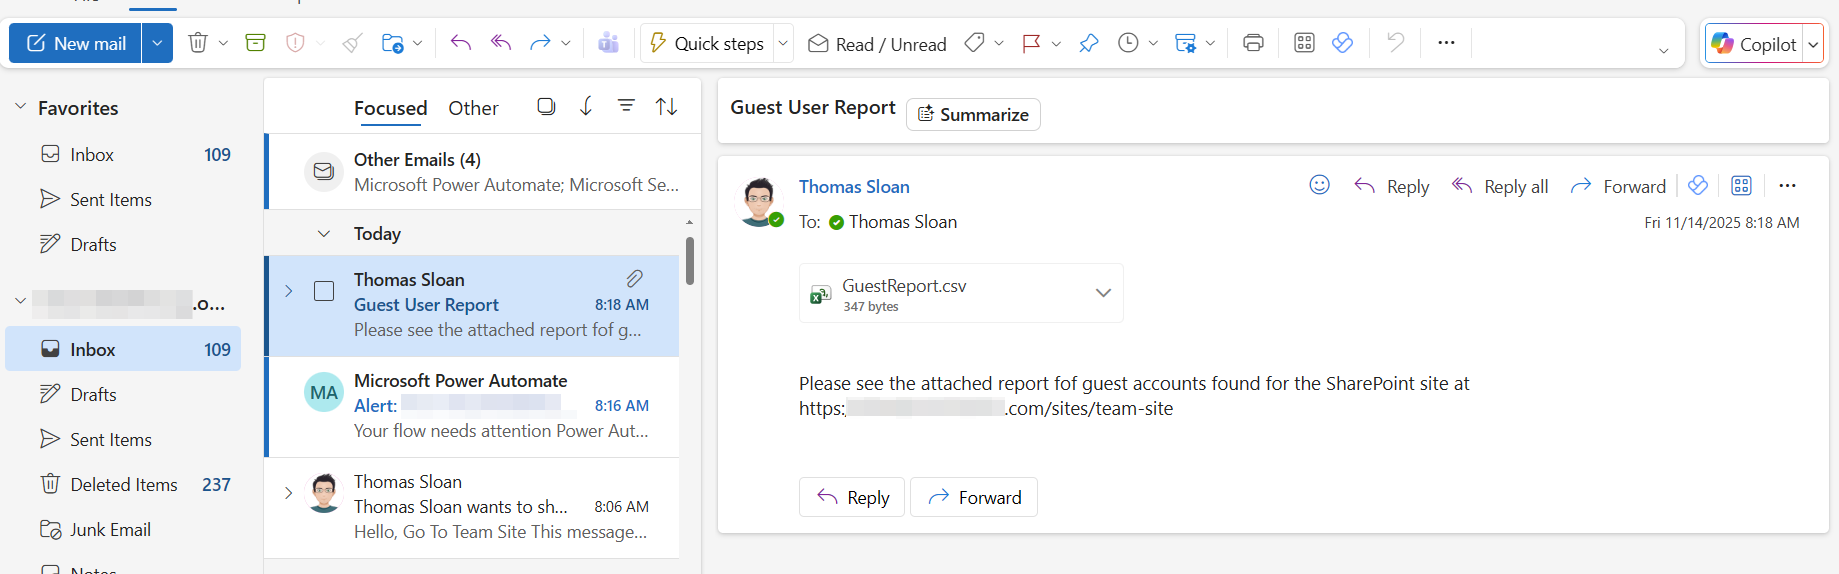
Here is what the report looks like